Saturday, December 22, 2012

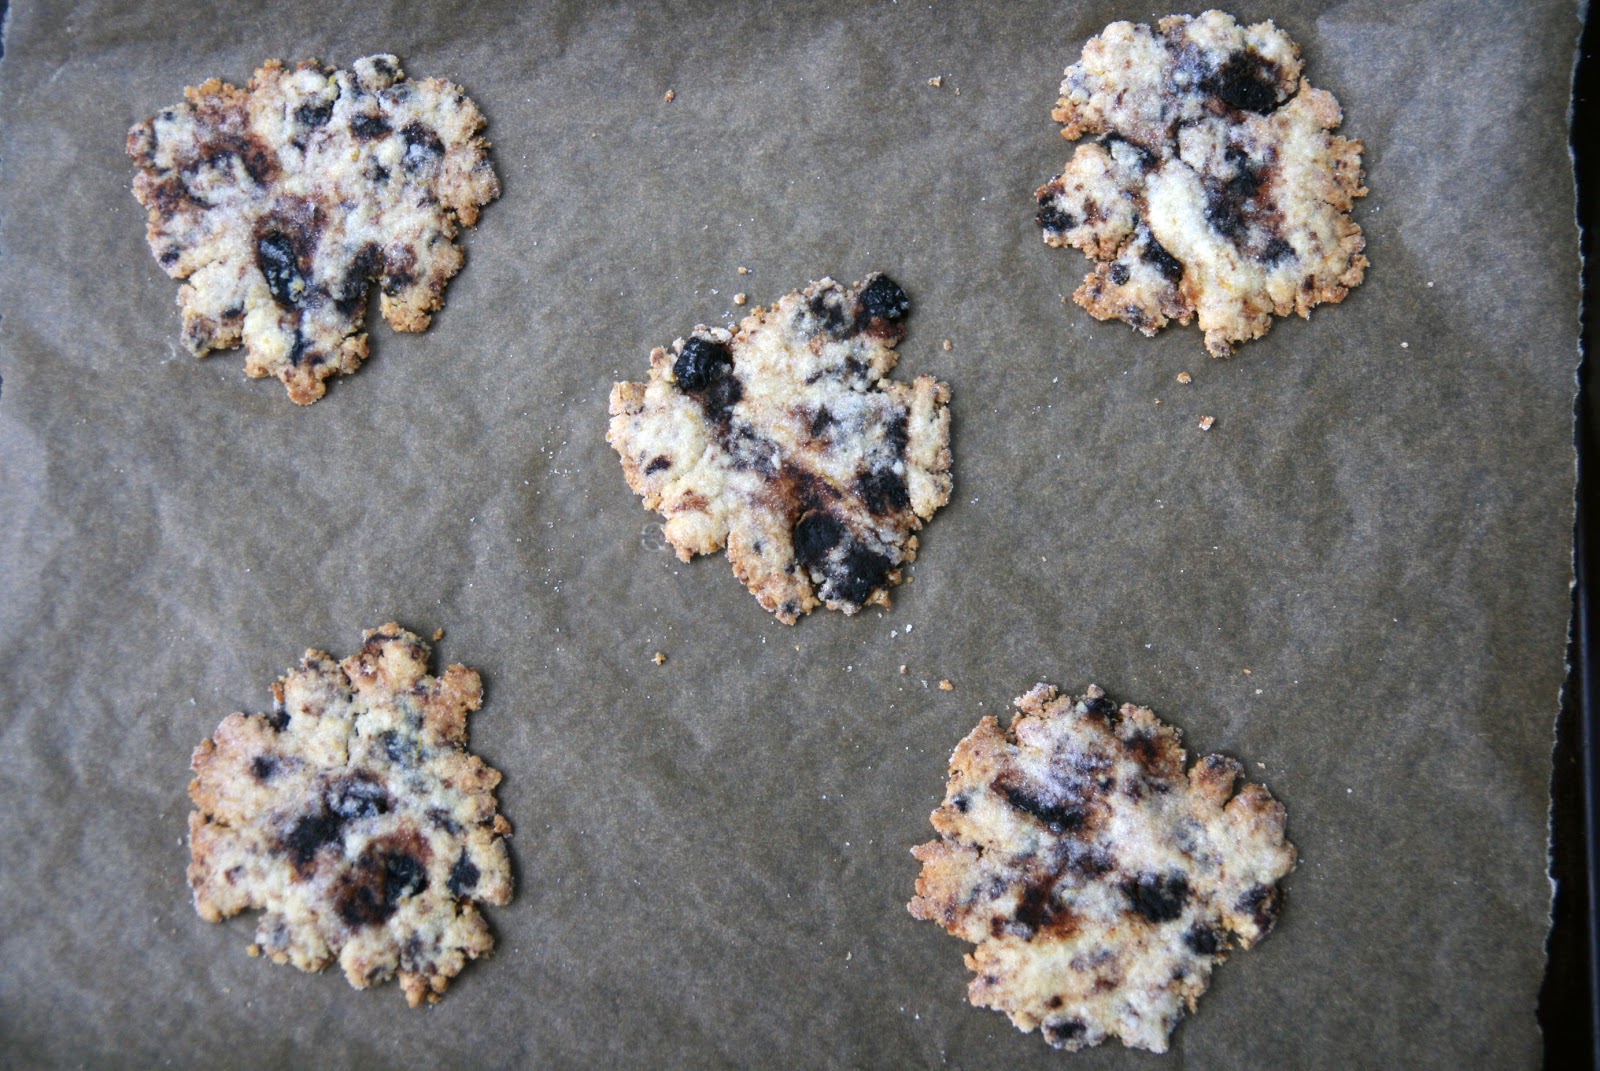
Portuguese Sweet Lemon and Olive Cookies


It's cookie season! Despite my best intentions, I've found myself lingering at the dessert table at for multiple tastes of chocolate chips and powdered sugar, or tearing at packages, hoping that someone has sent me a box of ninjabread men. I guess it's just not December without a cookie tray. But here's the thing: all those cookie trays? They're kinda sweet. And buttery. And after a few social occasions, it can all be a Bit Too Much.

So what to do in this season of cookie overload (beyond saying no to the cookie tray, which we all know is just crazytalk)? Turn to a cookie that's not quite so sweet. Or so buttery. Something a bit salty — briny, even. With a hefty helping of lemon zest. Like this Portuguese sweet lemon and olive cookie.

When I first spied this recipe from the amazing David Leite, I thought that these were just a sort of savory biscuit, some European too-sophisticated-for-sugar affair. But they are decidedly cookies. Just a more complex, salty-sweet version. They're studded with rich, briny, oil-cured olives, and punched up with lemon zest, sugar and olive oil (making them, to the delight of the lactose-intolerant, dairy-free). The sparkly dusting of sugar makes them sweet and festive enough to let you know you're firmly in the celebratory cookie season, but their rustic rough edges and briny notes are different enough to give a bit of a relief from it all. And they go beautifully with a glass of wine, cup of eggnog, solstice ale, or mug of tea — whatever it is you're using to toast the season. Happy holidays!


Portuguese Sweet Lemon and Olive Cookies
adapted from David Leite 
yields ~18 cookies

1 1/2 cups flour
1/4 cup sugar
1/4 teaspoon baking powder
1/2 cup oil-cured olives, rinsed if excessively salty, then pitted and coarsely chopped
2 tablespoons finely grated lemon zest
pinch coarse salt
1/4 cup olive oil
1 large egg

Preheat your oven to 375° Fahrenheit. Cut three sheets of parchment paper to fit your cookie sheet, and set aside.

In a large bowl, mix together the flour, sugar, baking powder, chopped olives, lemon zest, and salt. In a separate bowl (I used the measuring cup with the oil), beat together the olive oil and egg until well combined. Pour this mixture into your dry ingredients, and mix well, until the dough comes together when you squeeze it (it won't come together into a cohesive ball, but it'll come together as you shape each cookie).

Lay out one of your sheets of parchment on a clean counter, and set out a small dish of additional sugar (start with maybe 1/4 cup). Pull off generous tablespoons of dough, and squeeze and then roll them to shape into balls. Shape 5 balls, roll them in the dish of sugar until well coated, and place on the parchment paper with ample space between them. Place one of the other sheets of parchment on top, and smush each cookie with your hand to flatten. Take a rolling pin and roll out further, until the cookies are about 4 inches across, and a scant 1/16th inch thick (don't worry about the rustic ragged edges — that's how these cookies should look). Transfer the parchment to a cookie tray, and bake until just browned on the edges and sort of pebbled on top, ~10 minutes. While the cookies are baking, shape the remaining dough for the next round. When done, let cool on a rack (Leite recommends fresh parchment for each batch, but given the short cooking time, I was easily able to cycle through mine). Store in an airtight container for several days, or bring to your holiday party that very night.

Sunday, December 09, 2012

Apple Cider Doughnuts


The best doughnut is a fresh doughnut. I know, I don't have to tell you that. But this might be news: the best hour-or-so-old doughnut? That's a cake doughnut.

So doughnuts come in two main forms: yeasted and cake doughnuts. Even if you don't think you know the difference, you probably do. Yeasted doughnuts are airy and fluffy (from, you guessed it, yeast), the fried pillows that you find filled with custard or jelly. And cake doughnuts are, well, a bit cakier, a bit firmer. The kind you find at the apple orchard.

As a rule, I love the fluffy pillow of a yeasted doughnut best of all. But here's the thing: yeasted doughnuts do not age well. At all. After they cool down, they're just sad pillows of air and grease. But cake doughnuts? They hold up great. Sure, they're best hot from the oil. But even the next morning, their sturdier crumb (sturdier-yet-still-somewhat-delicate, mind you) still makes for a fine accompaniment to your morning coffee — especially if you've rolled them in some cinnamon sugar to sop up the grease. And so, when I wanted to bring some doughnuts to a Hanukkah party, and that party was being held more than half an hour from my kitchen, I decided to make up a batch of cake doughnuts.

These are dangerously delicious. The liquid in the dough comes from boiled-down cider and buttermilk, which are both baking perfection. The apple flavor comes through (thanks to the concentration), but subtle enough to play nicely with the other spices. There is some fussing involved — the dough must be par-frozen and then chilled — but the delicate handling of a soft dough yields doughnuts that are toothsome-yet-light. They're amazing straight from the pan. But even a few hours later at a party? They're pretty amazing as well.

And if you're looking for another greasy treat to enjoy this holiday season, I can direct you toward a recent story about spinach and cheese boyos. They come with their own rich tradition (and their own lashings of oil), over at NPR. Happy Hanukkah!


Apple Cider Doughnuts

adapted from Lauren Dawson at Hearth Restaurant, via the Washington Post
yields 18 doughnuts (and doughnut holes)

1 cup apple cider
3 1/2 cups flour, plus additional for the work surface
2 teaspoons baking powder
1 teaspoon baking soda
1/2 teaspoon ground cinnamon
1/8 teaspoon ground nutmeg
3/4 teaspoon coarse salt
4 tablespoons butter, warmed to room temperature
1 cup sugar
2 eggs
1/2 cup buttermilk (if you don't have, you can substitute an equivalent amount of milk with a hefty splash of cider vinegar, or, if you're frying for dairy-free folks, cider vinegar plus coconut milk is a crazy good substitute)

oil for frying
1 cup sugar tossed with 1 heaping spoonful cinnamon to finish

Start by reducing the cider: Pour into a saucepan, and bring to a boil over a medium-high heat. Reduce until it's just high enough to maintain a rolling simmer, and let cook off until reduced to 1/4 cup, ~20 minutes. Set aside to cool.

In a large bowl, sift together the flour, baking powder, baking soda, cinnamon, nutmeg and salt. Set aside.

Fit a mixer with a paddle attachment, and beat together the softened butter and sugar for a few minutes, until light and fluffy. Add the eggs, one by one, stopping to scrape down the sides. Add the boiled-down cider and buttermilk, mix until well combined, then add the flour mixture and stir on low until the mixture just comes together — do not overmix!

Line two sheet trays with parchment or waxed paper, and sprinkle generously with flour. Turn the dough out onto one of the sheets, sprinkle with a bit more flour, and pat/roll until it's 1/2-inch thick. Transfer the tray to the freezer until it firms up slightly, ~20 minutes.

Remove from the freezer, and round up some dough cutters (Dawson recommends 3-inch rounds, but I used my 2-1/4-inch round cutter for the doughnuts, and a well-cleaned cap from a bottle of Campari for the holes). Cut out the shapes, and transfer to the other tray. Mush the scraps together, re-roll, and cut out the remainder. Move the tray to the refrigerator, and let relax there for 20-30 minutes.

When the dough is nearing the end of its relaxing time, heat a few inches of high-heat oil in a large pan (I used my cast iron Dutch oven) over a medium-high heat to 350 degrees. Prepare a rack for the cooked doughnuts, or a plate lined with paper towels or brown paper (I ripped up a few grocery bags). Mix together the sugar and cinnamon in a bowl.

When the oil is hot, add a test doughnut. It should become brown on the first side in about 60 seconds, and on the second side in a little less. If it passes this test, add a round of doughnuts. Cook until brown, flip, and fry until brown on the second side. Transfer to your prepared tray/rack, let drain/cool for a moment, then transfer to the sugar-cinnamon mixture. Coat with the mixture on each side. Enjoy hot, or not.


Sunday, December 02, 2012

Scallion Latkes with Rice Vinegar Sour Cream


    It's a long-standing, well-documented tradition that American Jews go out for Chinese food on Christmas. In fact, a Borscht Belt-worthy joke about the practice even made it into the record of the Senate Judiciary Committee. There are many theories as to why, but they all generally acknowledge this basic fact: Chinese restaurants tend to be open on Christmas.  And so, for many American Jews, memories of December are scented with egg rolls as much as pine boughs. So why not bring Chinese flavors into the classic Hanukkah potato pancake as well?

    For the record, I still love me a classic latke — the ones that taste of nothing but potatoes, onions, and salt (and, you know, oil). But I also love me a good scallion pancake. And so, for this Hanukkah (which, to my utter surprise, begins in a week), I've combined the two. Behold the scallion latke. With rice vinegar sour cream.

    These latkes still have that deliciously fun French-Fries-for-dinner oily air of a standard potato pancake. But then it gets a bit more interesting. There are a few bunches of fresh scallions, both whites and greens, and some fresh garlic and ginger (not found in the traditional scallion pancake, but common in Chinese cuisine and brilliant at cutting through the oil). The fried pancakes are served with sour cream that's been further soured with the tang of rice wine vinegar, and topped with a drizzle of toasted sesame oil and soy sauce (and a garnish of scallions because, well, why not). It's a delicious way to combine the best of these culinary traditions.

    And in other news of cozy winter traditions, here's a recent story on the history of weaving with dog fur. Yes, you heard me. You can listen over at the Northwest News Network.


    Scallion Latkes with Rice Vinegar Sour Cream

    yields ~3 1/2 dozen small latkes

    I'm always a favor of frying latkes in advance, so that you can actually sit down and enjoy them with your dining companions (and, if you're entertaining, you don't greet your guests with a house that smells of fry oil). I also think that the rest and reheat lets them cook a bit more evenly, and some of the oil comes out in the oven. Just make the latkes in advance as directed, let cool, and transfer to a sealed container in the freezer (you can layer with paper, or else par-freeze and then toss in freezer bags). Bake on a rimmed sheet, straight from the freezer, at 375° Fahrenheit until sizzling and starting to color a bit more.

    Latkes:
    5 pounds russet potatoes, scrubbed but not peeled
    2 large bunches scallions, finely minced (set a few spoonfuls aside to garnish the finished latkes)
    8 cloves garlic, minced or pressed
    2—3-inch knob fresh ginger, grated
    1 tablespoon salt
    1/2 teaspoon ground white pepper
    2 eggs
    1 tablespoon toasted sesame oil
    1/4 cup matzo meal

    1-2 cups high-heat oil for frying

    For Serving:
    1 cup sour cream
    1 tablespoon rice wine vinegar
    soy sauce
    toasted sesame oil
    sliced scallions

    Line a strainer with a large piece of cheesecloth or a loose-weave dish towel, and place in the sink or over a bowl. Shred half of the potatoes on the coarse holes of a box grater, and place the shreds in the lined strainer (if you have a food processor with a shredding disk, use that instead, then place about 1/4 of the shreds back in the bowl with a chopping blade, and pulse a few times to yield smaller bits that will help bind).

    Pick up the ends of the dish towel or cheesecloth and gather it around the load. Twist and squeeze to wring as much liquid as possible from the mixture, twisting further as more liquid is released. When it's as dry as possible, place the wrung-out mixture in a large mixing bowl. Repeat with the remaining potatoes.

    Add the scallions, garlic, ginger, salt, pepper, eggs, sesame oil and matzo meal to the potatoes, and stir well to combine. Pour the oil into frying pans to a depth of 1/2 inch, and heat over a medium-high heat until a shred of potato sizzles when dropped in. Shape three tablespoons of the latke mixture into a round shape (I like to pack a 1/4 cup measure three-quarters full) and place in the oil. Flatten slightly to form a small pancake. Repeat as many times as your pan space allows. Cook the latkes until they're well-browned, 5 to 7 minutes, then flip and brown the other side (play with the heat if it's taking much more/less time). When the second side has cooked, place on a plate lined with brown paper or paper towels, stacking with additional paper or paper towels as needed.

    To serve, stir the rice wine vinegar into the sour cream (taste, and add more if you favor a bit more tang). Top each latke with a dollop of the tangy sour cream, a small drizzle of soy sauce and/or sesame oil, and a sprinkling of the reserved scallions. Serve.

    Sunday, November 25, 2012

    Challah with Chocolate and Salt


    Sometimes there are ideas that are so simple — and yet so deliciously perfect — that you wonder why it took you so long to come up with them. Like using pomegranate seeds to garnish absolutely everything you make while they're in season (in my case, including, but not limited to: salads, oven-roasted squash, a bowl of hummous, etc). And dry-toasting garlic before making garlic bread (more on that later). And adding chunks of chocolate and flaky sea salt to challah.

    This long-overdue combination comes from the brilliant Sassy Radish. Admittedly, it's a relatively simple tweak — all of the ingredients are basic staples, nothing too surprising. But when you take this slightly sweet, eggy dough, and then tuck in some big  chunks of chocolate and a generous sprinkling of flaky salt, the results are so, so good.

    Challah, with its rich-yet-light-softness, perfectly offsets the chunks of chocolate. And the salt, which may seem a bit excessive at the outset, turns out to be just what the combination needs. The resulting loaf is savory-sweet enough for a grown-up dessert, and makes a perfect match for your morning/afternoon cup of coffee. And compared to buttery brioche or pan au chocolate, it even seems somewhat healthy. But more than anything else, it just seems meant to be. I don't know why it took us so long to realize.

    And in news of elegantly simple solutions from elsewhere in the internets, here's a story I produced for NPR on cooking with a mortar and pestle. Also, I had the good fortune to sit down with the queen of good kitchen ideas, Deb Perelman of Smitten Kitchen. You can read that interview over at The Oregonian.


    Challah with Chocolate and Salt

    adapted from Sassy Radish

    3/4 cup apple cider (you can also substitute all or part orange juice, or water in a pinch)
    1 tablespoon active dry yeast
    1 large egg
    2 large egg yolks
    1/3 cup olive oil
    1/3 cup honey
    1 tsp coarse salt
    ~4 — 4 1/2 cups flour
    3/4 cup chopped chocolate
    1 egg, lightly beaten with a splash of water (henceforth known as the egg wash)
    flaky salt for sprinkling

    Pour the cider in the bowl of a stand mixer, then sprinkle in the yeast. Let sit ~5 minutes, to allow the yeast to soften and bloom.

    Add the egg, egg yolks, oil, honey and salt. Fit the mixer with a whisk attachment, and mix until the liquid is well-blended. Add a few cups of the flour, mixing until it forms a batter.

    Remove the whisk attachment, and fit the mixer with a dough hook. Add the remaining flour, bit by bit, until a soft and sticky dough is formed that just clears the sides of the mixing bowl, but still sticks to the bottom. Continue kneading with the dough hook for a few more minutes, to form supple, sticky, and well-developed dough.

    Lightly oil a large bowl, and turn the dough out into it. Swish it around, then flip it over, so that the top is oiled as well. Cover the bowl, and let rise until doubled, ~1-2 hours, depending upon the temperature of the room. When risen, punch it down to deflate (I like to flip it over at this point, but it's not necessary), and let rise another hour or so (it doesn't need to entirely double this time, but you want to see some rising). The dough can be refrigerated overnight for either of these rises — just remove it and give it an hour to come to room temperature before proceeding with the recipe.

    After the dough has risen for the second time, line a baking sheet with parchment or dust it with cornmeal. On a lightly-floured countertop, divide the dough into strands for the braid of your choosing — you can do a standard three-strand braid, or search the internet for an ornate braiding method of your choosing (I'm still obsessed with this foursquare braid, which seems to work particularly well for this challah). After you've divided the dough into portions for your braid, press each portion into a rough oval, and scatter on the chocolate chunks. Roll the dough up into a cylinder, squeezing out any air and sealing the seam. Roll the dough strands out into long ropes (if the dough resists, let it sit for a few minutes to relax). The chocolate chunks may remain inside the dough, or work to the outside — either will make for a good result. Weave the strands into the challah, and place on the prepared sheet.

    Brush the dough with the egg wash (a brush is best for this, but I've made do with my fingers at times), and let it rise until it's increased by half, ~45 minutes to 1 1/2 hours, depending upon the room temperature (you want to make sure the final rising is complete — if the challah hasn't risen enough, it can end up either too dense, or expand raggedly in the oven, ruining your pretty shape).

    While the dough is rising, preheat the oven to 375° Fahrenheit.

    When the dough has completed its final rise, give it another brush with the egg wash (be delicate to avoid deflate all that nice rising that's just happened), and sprinkle generously with the flaky salt. In fact, even more than you think is generous, taking care to sprinkle in the seams and towards the sides, for maximum salty coverage after baking. Transfer to the oven, and bake until the bread is burnished to a dark brown and smells done, ~35-45 minutes (if it's browning too quickly, you can dome with foil for the final 15 minutes of baking, but I tend to favor a dark challah). Transfer to a rack, and allow to cool before slicing. Don't worry — the chocolate will be nice and melty for a few hours.

    Saturday, November 17, 2012

    Apple Frangipane Galette with Cranberries


    This time four years ago, I was in New York, completing a public radio internship. I was getting an on-the-job crash course at a stellar program, but I was also kind of freaking out. I was far from home and dog, uprooting my life at the same time all of my friends seemed to be Getting Their Shit Together. I spent my nights house-sitting at the apartments of various friends who all had someplace better to be for the holidays (or else schlepping hours on public transit to sleep on a couch at my mother's house), and I spent my days worrying so much about mastering this unfamiliar work that my forehead would literally hurt from the stress of it.

    And then, amidst the winter storm, I heard about the WNYC pie contest. Yes! I could temporarily set aside the still-unfamiliar work of radio production, and turn to the always-comforting kitchen. I could go from feeling alone in the hallways to sharing my recipe with admiring new friends. So I pulled together some of the best flavors of the season, felt my way through someone else's kitchen, and crafted this apple galette — a beautiful array of crisp apples atop a rich swipe of frangipane, then topped with a sprinkling of jewel-bright cranberries. And I lost. I didn't even place.

    So yeah. It wasn't quite the triumph I was hoping for. But you know what? Things got better nonetheless. I got the hang of radio production, and, perhaps more importantly, realized that even though something scares the bejesus out of you doesn't mean it isn't valuable and rewarding in the end. That while stress can make your forehead ache, it can also reshape your life in ways you never thought possible. And that even if your galette didn't win over the hard-nosed judge (especially when it was hacked into tiny pieces, its beauty destroyed prior to evaluation), you can take the recipe, tweak it a bit, and come up with something that will win over legions of new fans. And that even if it doesn't, that's okay too. Because even as the days darken, and the radio deadlines loom, there's still a whole lot to be thankful for.


    Apple Frangipane Galette with Cranberries

    This galette is perfect for Thanksgiving — it's a nice little spin on tradition, and it's also much lighter than the standard overfilled apple pie, so as not to push you over the post-feast edge.

    Frangipane:
    1/3 cup ground almonds (I tend to keep a bag of this in my freezer, but if you don't stock it, just start with a slightly larger amount of whole almonds, and grind the mixture longer)
    2 Tbsp sugar
    2 Tbsp butter, softened to room temperature
    pinch salt
    1/2 egg (reserve the other half for brushing the crust)

    3 good-sized crisp, tart apples, such as Granny Smith
    1 unbaked pie crust (I still haven't found anything better than this — and I make a lot of pies)
    scant cup cranberries (if using frozen, no need to thaw)
    1 Tbsp butter, melted
    1/2 egg (left over from the frangipane), beaten with a splash of water or milk (aka the egg wash)
    sugar for sanding the top (coarse sugar is especially nice, but regular sugar works fine as well)

    Preheat your oven to 400° Farenheit.

    To make the frangipane: Place the ground almonds, sugar, butter, salt, and half the egg in a food processor, and process until a smooth mixture forms, scraping down as needed. Set aside.

    Peel and core the apples, then thinly slice (I tend to keep the slices together, so that I can just fan them out into the finished tart). Roll out the crust to a about 14 inches in diameter, then either place on a parchment-lined baking pan, or drape into a tart pan. Spread the prepared frangipane in a thin layer along the bottom of the tart crust (or, if making a free-form galette, in a 9-inch circle in the center of your dough), then arrange the apple slices over the top. If you're feeling particularly inspired you can fan them out in concentric circles, but it'll look pretty even if you're lazy like me and go for a less geometrical approach. Scatter the cranberries over the top, then fold the overhanging edges of the pastry over the fruit. Brush the crust with the egg wash, and then drizzle the melted butter over the exposed fruit. Sprinkle sugar generously over both the fruit and crust, so that they're coated with a thin layer.

    Transfer the galette to the oven, and bake until the crust is browned and the filling is cooked and bubbling, ~35-45 minutes. Set aside, let cool slightly, and serve.

    Monday, November 12, 2012

    Chocolate Juniper Cake with Milk Jam Sour Cream


    I tend get my hackles up over use of the word "special." It so often smacks of faint praise, or overcompensation. It's possible I'm a bit of a hater. But recently my friend Brian helped me come around. As good friends and neighbors, we end up eating a lot of meals together (and sharing too-good-not-to-bring-next-door bites of many more). And there have been times during these meals where he'll just pause, savoring everything about a singular mouthful, and then pronounce it special.

    Maybe it's the fact that Brian's a particularly dear friend, or the total wide-eyed sincerity with which he shares this reaction. Whatever it is, it's helped me get over my surliness and embrace the word. Because he's right. Some things truly are special. Like this cake.

    I first saw this cake posted on Bon Appetit, and figured that it was the sort of thing best left to the professionals. But then I saw it on a beloved blog, and thought perhaps it was within the mortal realm. And then I made it, and I shared it with my neighbors, and we moaned out some expletives about how holy crap good it was.

    Amazingly, it's not even all that complicated. The cake itself is just a simple two-bowl chocolate cake — you don't even have to remember to soften butter or anything. But there are a few simple steps that take it beyond. First off, the cake is scented with juniper berries (thankfully sold in bulk at the local natural market down the street), which manage to both deepen and cut through the chocolate with their unique woodsy vibe. Then you make a sauce that manages to be both milky-sweet and rich and tangy at the same time. And then — even better — you firm up the cake in the freezer, dredge it in sugar, and give it a quick pan-fry to yield a delicately caramelized crust. The end result makes you question all of your previous cake-making. Why isn't chocolate always paired with juniper? And milk jam sour cream served on everything? And seriously why isn't every cake caramelized prior to serving? None of these tweaks is all that difficult, and all are within the grasp of pretty much any cake-baking home cook. And the end result is really, really special.


    Chocolate Juniper Cake with Milk Jam Sour Cream

    adapted from Oxheart, via Bon Appetit 
    serves ~10 (you can also halve the recipe and bake in an 8-inch pan instead)

    Cake:
    2 heaping teaspoons juniper berries
    1 3/4 cups flour
    1 2/3 cup sugar (plus more for caramelizing the cake)
    1/2 cup plus 1 Tbsp cocoa powder
    2 tsp coarse salt
    1 1/2 tsp baking soda
    3/4 cup buttermilk (if unavailable, substitute soured milk)
    3/4 cup neutral oil, like vegetable or grapeseed
    2 large eggs

    Milk Jam Sour Cream:
    1 cup sour cream or creme fraiche
    1-2 Tbsp sweetened condensed milk (if you'd like to make your own milk jam, boil down 2 cups milk with 1 cup sugar until you're left with a darkened, sweetened cup, ~45 minutes — and, as a bonus, leftover milk jam or sweetened condensed milk keeps for a while and is great stirred into your coffee)

    To make the cake: Preheat your oven to 350° Farenheit. Grease a 9x13 pan, line the bottom with parchment and grease again, then dust everything with flour. Set aside.

    Heat a dry skillet over a medium heat, then dry-toast the juniper berries until they become oily and fragrant (this will barely take a minute). Let cool slightly, then grind in a spice grinder.

    In a large bowl, sift together the ground juniper berries with the flour, sugar, cocoa powder, salt, and baking soda. In a separate bowl, whisk together the buttermilk, oil and eggs until well combined. Pour the wet ingredients into the dry, and fold or whisk until just combined (don't over-mix). Quickly transfer to your prepared pan, smooth the top if needed, and bake until a tester comes out clean, ~35-40 minutes. Remove from the oven, let cool, then transfer to the freezer until solid, at least two hours and up to three weeks (if the latter, wrap well in plastic).

    To make the milk jam sour cream: Stir the sweetened condensed milk or milk jam into the creme fraiche/sour cream to taste — you want something that's lightly sweet, but still quite tangy.

    To finish the cake: Remove the cake from the freezer, turn out onto a cutting board and discard the parchment. Trim off the edges, then slice the cake down the middle, so that you have two rectangles of about 4-inches in height, then slice each rectangle crosswise into 1 1/4-inch bars.

    Pour out some granulated sugar onto a plate, grab a pair of tongs if you've got them, and heat a pan over a medium heat (the recipe recommends nonstick, but I did this with a regular steel pan and it was fine). Roll each cake bar in the sugar, so that they're well-coated with a thin-yet-thorough dusting. Working in batches, transfer the cake slices to the skillet. Let caramelize on each side, turning to expose the next side when the side in the pan has melted and caramelized (once your pan is hot, it'll take less than 30 seconds per side). You can also caramelize the short ends if you are quite obsessive, but it's not necessary. Serve straight from the pan, with a dollop of milk jam ladled over the top.

    Monday, November 05, 2012

    Winter Squash Pizza (Pizza Zucca)


    A couple months back, I sung the praises of the seasonal flatbread. So easy, so thrifty, so crowd-pleasing, so perfect for highlighting the season's harvest with just a wee bit of cheese to hold it all together. And now, the November installment in the series: the butternut squash pizza.

    This is so surprisingly good, greater than the sum of its winter-squash-and-starch parts. A simple lean dough is topped with thinly-sliced squash (you soak it in salted water the night before, which renders it both softer and tastier), some onions and sage, and then just a sprinkling of cheese and breadcrumbs to tie it all together. The end result is deep and savory, with that bit of squashy sweetness, and rich and creamy with only a bit of dairy.

    And in other news of the power of bread to unify, here's a recent spot I produced on Election Day Communion. If there's any bread that may have the power to pull us through electoral politics, I'm putting my faith in this one.


    Winter Squash Pizza (Pizza Zucca)

    reconstructed based upon the guidelines from Grandaisy Bakery, as told to Slice
    makes one large pizza, serving ~6

    1 pound squash (about half a standard butternut, or two small delicatas)
    salt
    1 pound pizza dough (I'm currently obsessed with the recipe in Jim Lahey's book, which you all should get)
    1/3 pound gruyere or similar cheese
    1/2 red or yellow onion, cut into 1/2-inch dice
    handful of sage leaves, coarsely chopped
    olive oil
    salt and pepper
    1/4 cup breadcrumbs

    The day before: If your squash is large, cut it in half (you only need about a pound). Peel and scoop out the seeds, then slice very thin (about 1/8-inch thick). Fill a large bowl with water, and salt until it tastes quite salty, and add the squash slices. Let sit overnight.

    When you're ready to make the pizza, take your dough out of the fridge if it's refrigerated, and let come to room temperature for an hour. Preheat your oven to 500° Farenheit, and place a rack near the top.

    While the oven is heating and the dough is warming, prepare the filling. Drain the squash, then place in a large bowl and toss with the grated cheese, onion, and sage leaves. Drizzle in a few spoonfuls of olive oil, until it's well coated, and season with salt and pepper (you shouldn't need too much salt, since the squash will have taken in some salt from its soak, but you want to have enough to offset the squash's sweetness). Set aside.

    Grease a half-sheet tray with olive oil, or line with parchment. Turn the dough out onto a lightly-floured countertop, and gently stretch out into a long rectangle (I like to sort of drape it over the backs of my hands, to allow the weight to help stretch). If the dough resists, let sit for a few minutes to relax, and try again. When the dough is stretched out, transfer to the prepared tray, then push-pull it until it is evenly spread to the edges.

    Sprinkle the squash filling evenly over the dough, right up to the edges. Sprinkle the breadcrumbs evenly over the top. Bake until the squash is baked and starting to brown, and any dough you can see appears cooked, ~20-30 minutes. Let cool slightly, slice into squares, and serve.